Coconutspractical tips how to make your own coconut cream and much more
Did you know that the brown husk of the coconut makes great BBQ coal? And did you know that the thin papery woven parts from the coconut-tree are great to light the fire?
This is how you easily make your own real coconut milk and (whipped) cream:
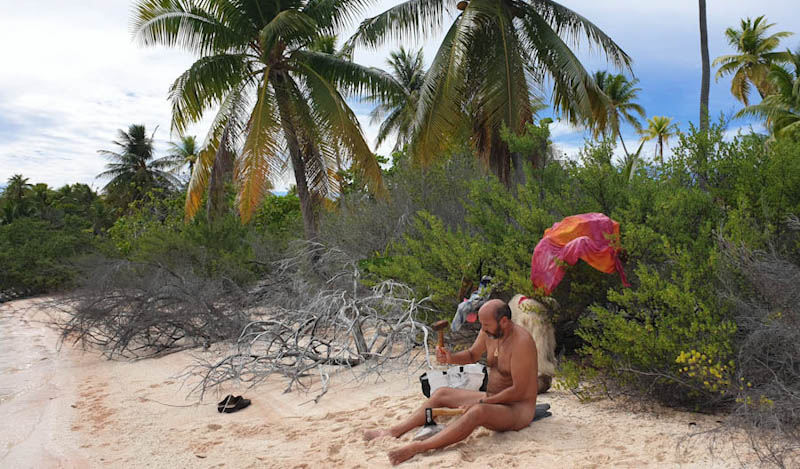
Step 1: gather and crack the coconuts
If you're lucky enough to be in paradise, of course you start with collecting coconuts. The mature ones (brown outer layer) are best for the coconut flesh because they have the most oil and taste and their water is the sweetest. The green ones have more water to drink, very refreshing but less mature taste than that of older ones. Locals are good with removing the outer husk of the coconut. We tried it and we suck at it haha so we don't bother to remove the outside of the coconut anymore.
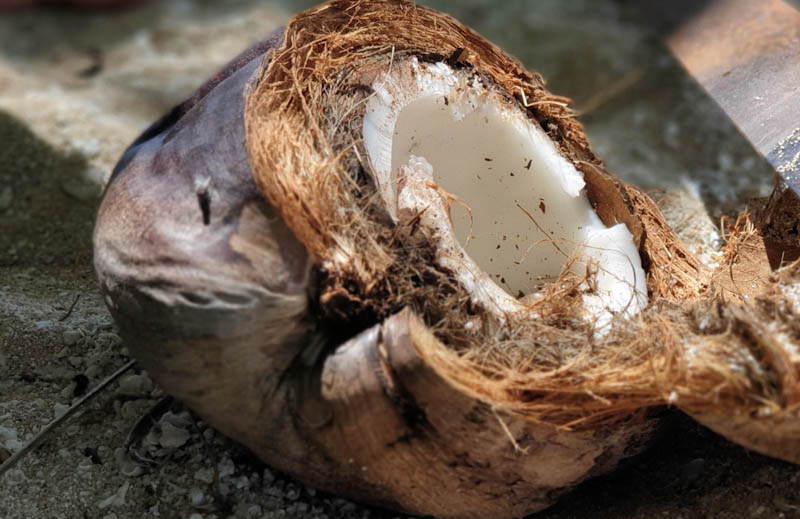
Step 2: take out the coconut flesh
We use an axe and slam it with a hammer until the coconut cracks in two halves. Mind the direction of the fibres, you need to have the axe in the same direction otherwise it won't work! If you want to use the water, then first drill a hole and drain or drink it before you crack it (always smell first!!) ;-) If you have the nut in two halves, you need to take out the flesh. The coconut-flesh comes out pretty easy with a flat screw driver and a small hammer. Just tap between the two layers. It takes a bit of practice but it's not too difficult.
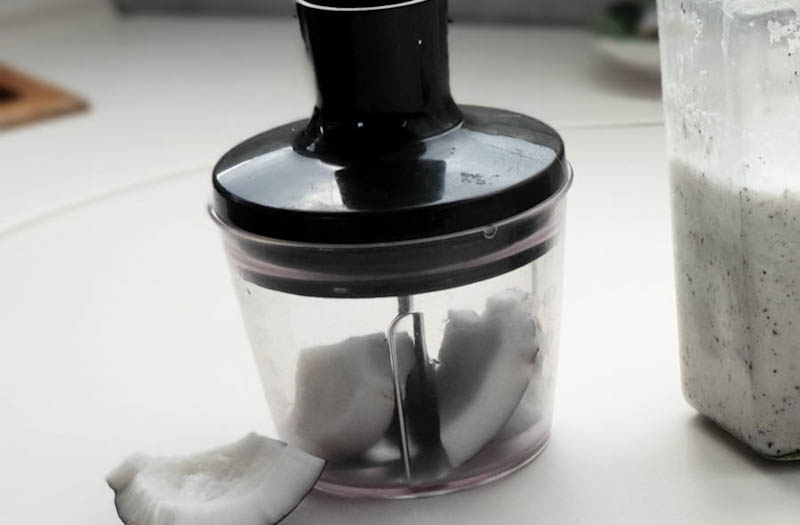
Step 3: cut the coconut into small pieces
If you have a blender with a small bowl, you're very lucky! If you don't, put it on your list of wannahaves because it's really handy for many things!! Put the pieces of coconut into the bowl and let it run for a while to cut it into very small pieces. Don't have a machine? Then you need to grind it by hand... and it will take a long time! In either case, don't bother to remove the brown part of the coconut, it will make your cream off-white but it doesn't affect the taste and it saves a lot of work if you leave it!
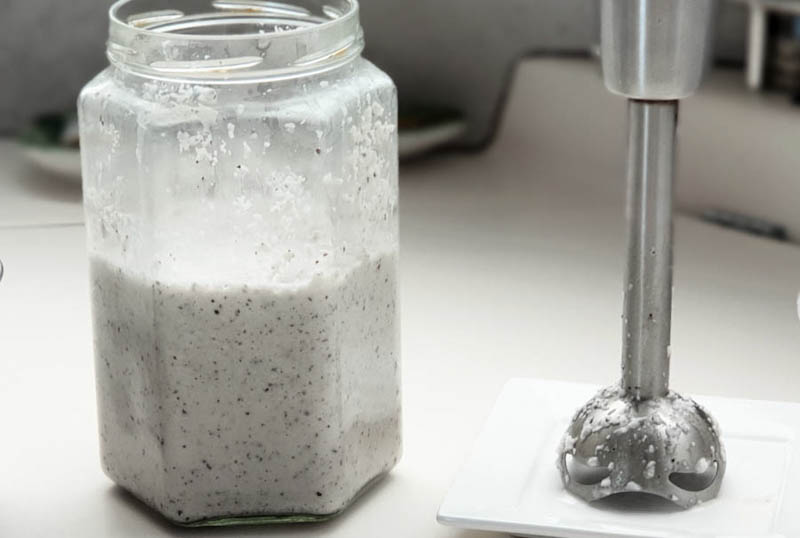
Step 4: pour hot water and blend
Put your small pieces of coconut in a pot and poor hot (boiling) water on top, just enough to cover them all. Take your blender and mix it for a while. The smaller the particles get, the better it gives away it's cream. Hot water makes it much easier to really extract the oily cream.
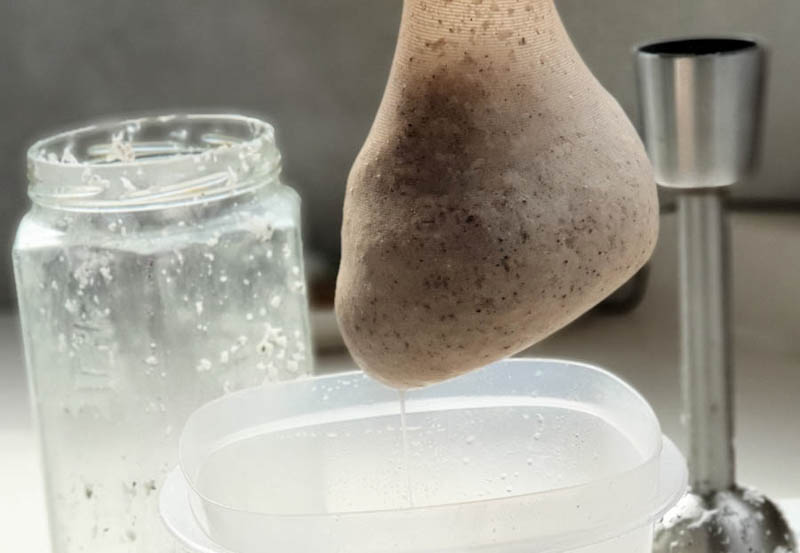
Step 5: filter it
Now you need to filter it. Traditionally they use a piece of fabric for this job but I discovered that a panty hose works like a charm and saves a lot of work! Just put a panty (now you know why you took them!) on top of your pot and turn it around above a collecting pot. Most comes out instantly, without any efforts and precisely there where you want it to be. :-D Then start milking it, just squeeze out the moisture. Beware, it might still be hot! The harder you squeeze, the more liquid comes out but also the less tasty your sprinkles become (yes, you get free coconut sprinkles!). So squeeze as little or much as you prefer.
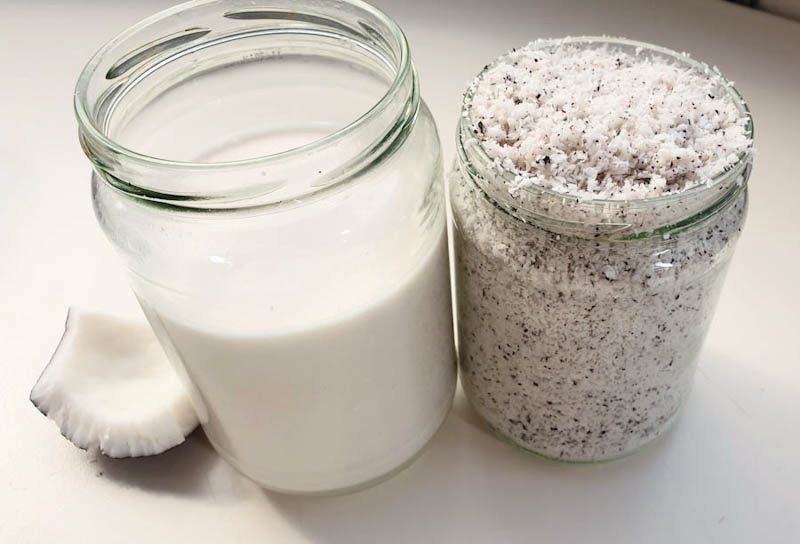
Step 6: enjoy the coconut milk or cool down to make cream
Your coconut milk and sprinkles are ready! You can use the milk as is, or you can turn it into coconut-cream. How? Just cool it down. By cooling down, the heavier liquid will sink to the bottom and the oily cream will float on top. Leave it in the refrigerator to separate for about 24 hours or so (freezer is faster).
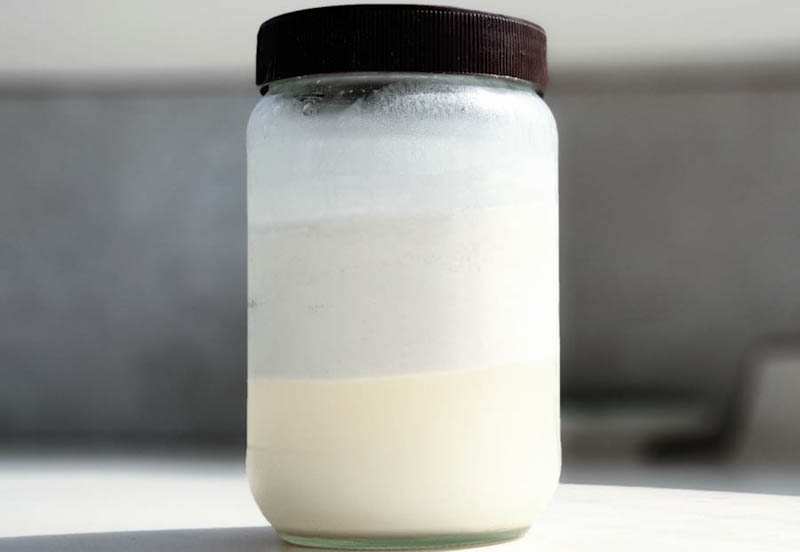
Step 7: check the result of the cooled coconutmilk
After your coconut milk has been cooled down, you will see a watery layer on the floor and a creamy layer on top. If your recipe requires you use the cream, just scoop off the top. If you didn't mean to make cream but only put the coconut milk in the fridge to store it, then simply shake well and you have a nice milk again.
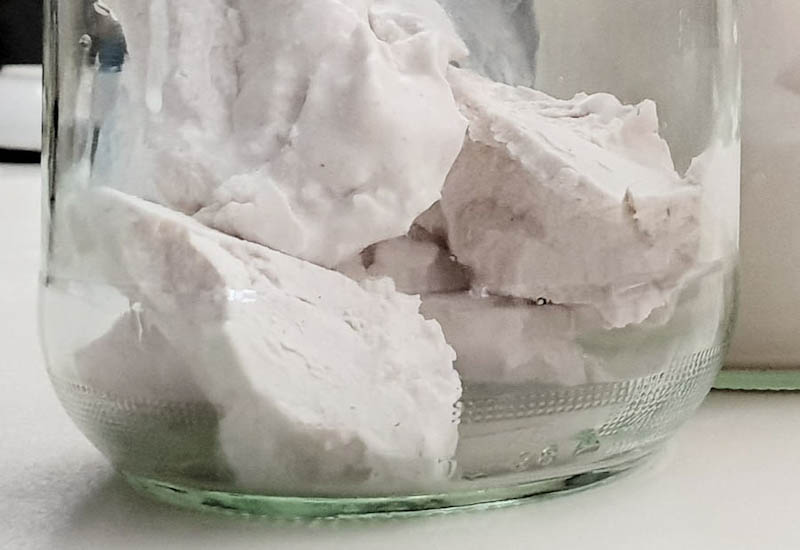
Step 8: cream or whipped cream
This is the creamy top scooped off the watery bottom after just a day in the fridge. The top became a really thick creamy coconut layer that is so thick that it keeps its shape. Do you want to make coconut whipped cream? Whip the cream and you will approximately double the volume and turn the thick cream into a really yummy creamy whipped coconut. It's an awesome replacement for regular whipped cream and if you're lucky enough to live in paradise and collect your own coconuts, it's completely plastic, fossil fuel and animal cruelty-free! Add sugar to your tasting. You know what's yummy? Whipped coconut cream on your boat-made bread, as a thick layer, then hazelnut paste and perfected with coconut sprinkles on top... To die for!
Sundowner rum-coco, ama-coco or whatever you like
Originally, you need to remove the husk of the coconut and then put a straw through one of the three soft eyes that every coconut naturally has. But we lazy sailors prefer to drink more and work less so we found a much easier way to enjoy a coconut drink. During the day we don't poor in any liquor but just enjoy the pure coconut water. But during sundowner (did you realize that actually the sun goes down already after noon? ;-)), we like to spice it up with some rum or amaretto.
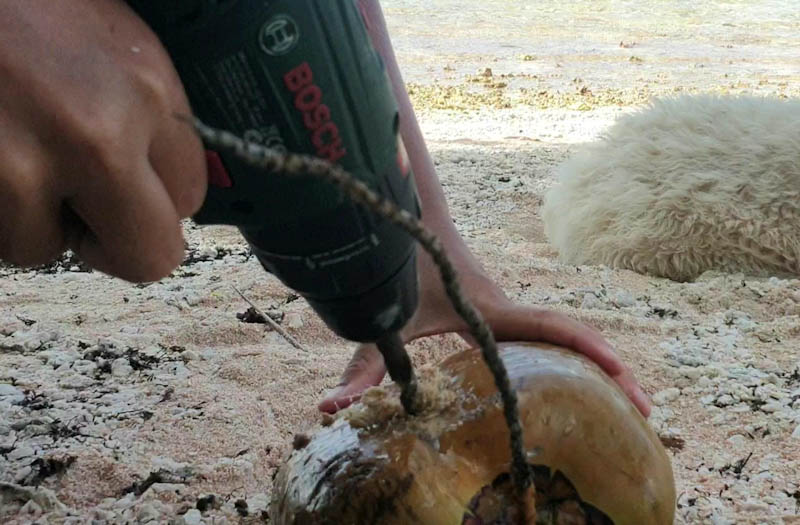
Step 1: drill a hole
Drill a hole through the whole coconut
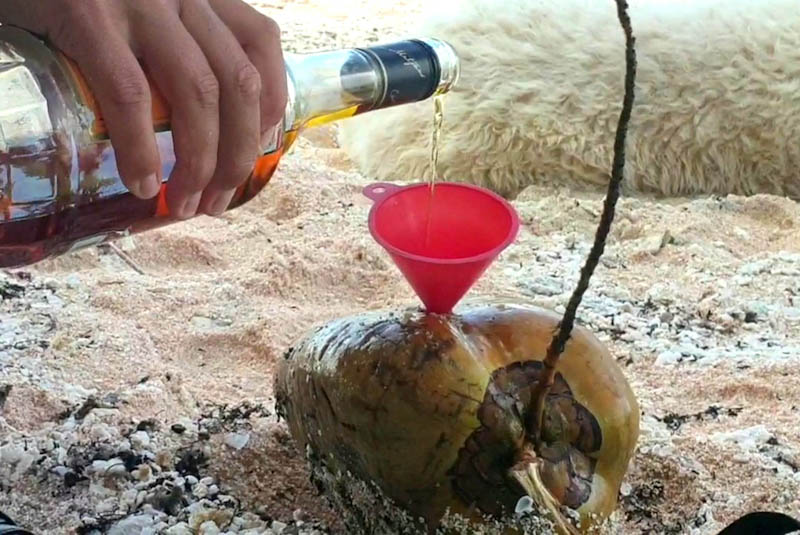
Step 2: smell, taste, poor in the liquor
Be careful, some coconuts (especially the young green ones), can be very full. Don't forget to first smell, then taste and take a sip to create some space for the liquor that you like. Rum is a good one but my personal favourite? Amaretto, by far!!! The combo with the coconut is superb imo.
Step 3: ENJOY
My little sister enjoying her ama-coco drink with a stainless steel straw (of course you wouldn't use a plastic straw!!)
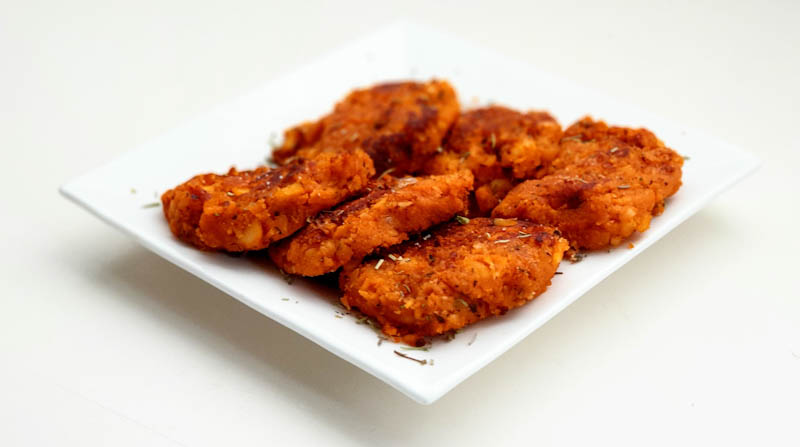
Coco-burgers and bread spread
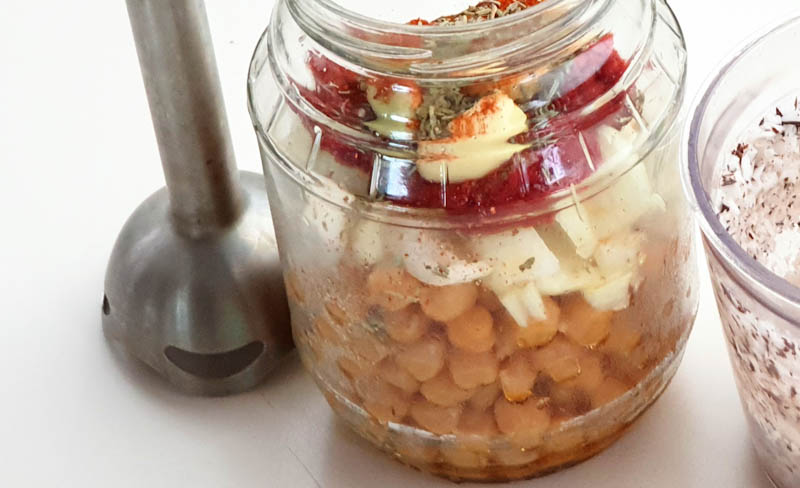
Step 1: Put ingredients together
Put cooked chickpeas, raw onion, tomato paste, garlic, olive oil, salt, honey, spices and a little water in a jar and mix it with a blender. Cut coconut into small pieces (not as fine as the mix, keep it separate).
Tip for cooking chickpeas: to save big time on storage weight, packaging and shipping waste, buy dried chickpeas (in bulk, Eco Vrac - Tahiti) and cook them yourself. It's really not a big deal, only takes a bit of planning. Pour dried chickpeas in a jar, fill it with (solar powered) boiled lightly salted water. Close the lid, cover it in a blanket and leave it for several hours/half a day. If you have a microwave and enough solar power, you can then boil it again until they are tender. If you don't have the solar or microwave, still use this technique with the boiling water because it reduces the cooking time a lot, much more than with cold water overnight!! Don't throw the chickpea cooking water away, it contains a lot of protein. Use it through your food or see below for a tip what to do with it for a nice Chocolate Coco bounty mousse.
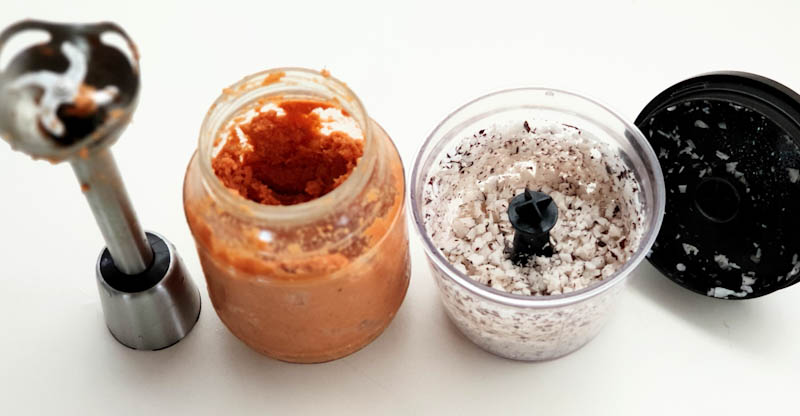
Step 2: Mix the chickpea paste with the coconutchips
If your chickpea-paste is ready, mix it with a spoon with the small pieces of coconut. The coconut makes your burgers more tender because of their oil content (so don't use sprinkles, use full coconut with the oil). The pieces of coconut also add a real nice bite to your burger, that's why you shouldn't blend too fine.
Step 3: Moist it more for bread spread or shortly bake for the burgers
The mixture should be reasonable firm for the burgers. If you like to use it as a healthy bread spread or for spread for toast, add some liquid to make it a bit thinner. Want to have a burger? Bake it shortly in hot oil. Since you used cooked chickpeas, it doesn't need the cooking, it's just a matter of warming them up and creating a nice crust. Don't bake them longer than necessary to keep them tender and moist.
Coco-meat-chips
Do you want to add some spice and bite to your dinner? A nice, super easy and very different way to use coconut is to cut it into thin slices (about 1-2mm thick), marinade it in teriyaki and spicy pepper and bake that in a frying pan. The chips spice up your food and add a nice bite to it.
Chocolate bounty mousse
For this recipe you need for about 5-6 persons:
Coconut sprinkles, about 6 tablespoons
Coconut fat/cream, 2 tablespoons
Chocolate bar, 200 gram
Chick-pea water (left over after boiling), 200ml
Slowly melt the chocolate with the coconut fat/cream. Whip the chick-pea water, that is the water that is left over after boiling / the water in a can with chick peas, until it is a thick foam. Use an electrical or smart mechanical thing, not simply whip by hand because that won't work or will take for ever). Slowly mix the melted chocolate and the foam. Add vanilla and sugar if you like. Poor it into bowls with coconut sprinkles on the sides. Put it in the fridge for at least four hours. Enjoy your delicious bounty-chocolate mousse!